Easy Homeschool Organization Ideas & Tips
Brilliant Homeschool Organization Ideas & Tips are what we all crave when the school day descends into a beautiful kind of chaos! Does your dining table perpetually double as a homework station, buried under papers and stray pencils? Are you constantly searching for that *one* textbook or a missing art supply? If your home feels less like a serene learning environment and more like a well-loved, but slightly cluttered, classroom, you’re not alone. Imagine instead a home where everything has its place, a calm and inspiring space that supports focused learning and happy exploration. Achieving this doesn’t require a huge budget or weeks of work; most of these solutions are budget-friendly and can be implemented over a weekend. In this article, I’ll share practical strategies and clever hacks to transform your home into a beautifully organized, functional homeschool haven.
Brilliant Homeschool Organization Ideas & Tips
As a homeschooling parent, I know the constant juggle. We want a learning environment that’s inspiring and effective, but let’s be honest, clutter can quickly creep in, turning our dedicated learning spaces into a chaotic mess. But fear not! With a few smart strategies and some practical organization ideas, you can transform your home into a functional, beautiful, and inspiring homeschool haven. It’s not about perfection, it’s about creating systems that work for your family and your space.
What You Need and Roughly What it Costs
Let’s talk practicality. Before we dive in, it’s important to have a general idea of what you might need and the potential investment. This isn’t about buying everything brand new; often, repurposing and smart shopping can make a big difference.
Core Organization Essentials:
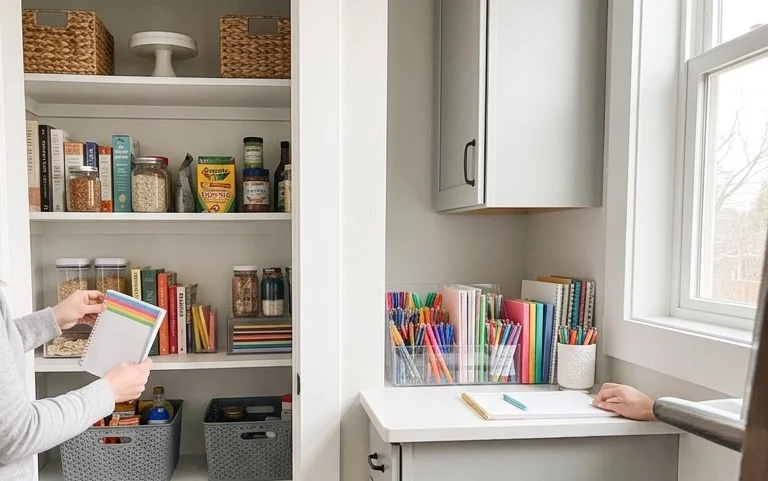
* **Storage Bins and Baskets:** These are your workhorses. Think clear plastic bins for visibility, fabric bins for a softer look, and woven baskets for texture. For a medium-sized homeschool setup, you might need 10-20 bins of various sizes.
* *Rough Cost:* $5 – $25 per bin, so budget $50 – $500 depending on quantity and quality.
* **Shelving Units:** Whether it’s a sturdy bookshelf, cube storage, or wall-mounted shelves, these are crucial for vertical storage. A standard 5-shelf bookshelf can be found for $50 – $150.
* *Rough Cost:* $50 – $300+
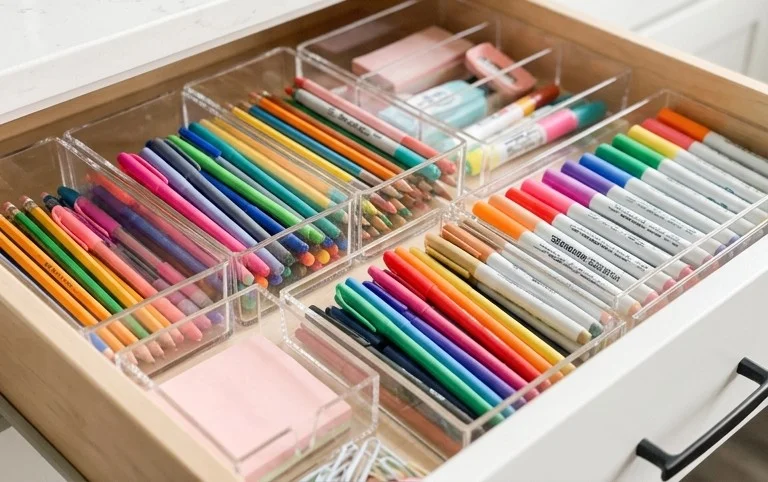
* **Drawer Organizers/Dividers:** For desks, art carts, or any existing drawers, these keep small items contained. A set of 6-10 dividers might cost $15 – $40.
* *Rough Cost:* $15 – $40
* **Label Maker or Sturdy Labels:** Essential for knowing what goes where. A good label maker can be around $30 – $70. Alternatively, pre-made labels or cardstock and a pen work too.
* *Rough Cost:* $10 – $70
* **Clipboards:** Perfect for holding current assignments or artwork. You might need 5-10.
* *Rough Cost:* $2 – $5 each, so $10 – $50.
* **Wall-Mounted Organizers (Optional but Recommended):** Like pegboards or wall grids, these are fantastic for freeing up surface space. A medium-sized pegboard with accessories can range from $40 – $100.
* *Rough Cost:* $40 – $100+
* **Desk Accessories:** Pencil cups, trays, and file holders. These can often be found affordably.
* *Rough Cost:* $20 – $100
**Total Estimated Budget:** For a comprehensive setup, you could be looking at anywhere from **$200 to $1000+**, depending on the size of your homeschool space, how much you already own, and your aesthetic preferences. Remember, you can always start small and build as you go!
How to Measure and Plan Before You Start
This is the most crucial step and often the one people skip! Rushing into buying bins and shelves without a plan is a recipe for wasted money and frustration.
1. **Assess Your Space:** Where will your primary homeschool learning happen? Is it a dedicated room, a corner of the living room, or a shared desk?
2. **Measure Everything:** Get out your tape measure!
* Measure the dimensions of the area you’re dedicating to homeschooling. Note width, depth, and height.
* Measure any existing furniture you plan to use, like desks or tables.
* Measure the items you need to store: textbooks, notebooks, art supplies, manipulatives, curriculum binders, etc.
3. **Categorize Your Supplies:** Group similar items together. Think:
* **Subject Specific:** Math manipulatives, science kits, reading books, art supplies.
* **General Supplies:** Pencils, pens, glue, scissors, paper.
* **Curriculum:** Textbooks, workbooks, lesson plans.
* **Completed Work/Portfolio:** Artwork, finished projects.
4. **Visualize the Flow:** How will your children move through the space? Where will they sit? Where will they access supplies? Imagine them working, transitioning between activities, and putting things away.
5. **Sketch it Out:** Grab a piece of paper and draw a simple floor plan. Don’t worry about being an artist! Just block out where furniture will go and where you envision your storage solutions. This is where you’ll see if that large bookshelf actually fits or if a smaller set of drawers would be more practical.
A Clear Numbered Walkthrough of the Process
Once you have your plan, it’s time to implement!
1. **Declutter Ruthlessly:** Before you organize, purge. Get rid of broken crayons, dried-out glue sticks, old workbooks you’ll never refer to again, and anything that hasn’t been used in over a year. Donate gently used items that are no longer relevant.
2. **Clean the Space:** A fresh start! Wipe down shelves, vacuum floors, and dust surfaces.
3. **Position Your Main Furniture:** Place your desk, table, or main shelving unit according to your plan. This creates the foundation for your organization.
4. **Install Shelving (If Applicable):** If you’re using wall shelves, now is the time to install them securely. Remember your measurements and ensure they’re at a height accessible to your children for items they’ll use regularly.
5. **Place Your Storage Containers:** Arrange your bins, baskets, and drawers. Think about what makes sense for accessibility. Items used daily should be at child-level or easily reached. Less frequently used items can go on higher shelves.
6. **Sort and Fill Containers:** This is where your categorized lists come in handy. Fill each bin or drawer with its designated items. For example, one bin might hold all math manipulatives, another all art paper, and a third all current reading books.
7. **Label Everything Clearly:** Use your label maker or labels to clearly mark each bin, drawer, and shelf. Be specific! Instead of “Stuff,” try “Math Manipulatives,” “Science Journals,” or “K-1 Reading.” This is key for everyone knowing where things belong.
8. **Organize Desk/Table Surfaces:** Use clipboards for current assignments, pencil cups for writing tools, and shallow trays for frequently used items like rulers or erasers.
9. **Utilize Vertical Space:** If you have wall space, hang pegboards or wall grids for frequently used art supplies, calendars, or even to display current learning objectives.
How to Adapt It for a Small Space or a Rental Where You Cannot Drill
Don’t let limited space or rental restrictions get you down! These scenarios just require a bit more creativity.
* **Small Space Solutions:**
* **Go Vertical:** This is your best friend. Think tall, narrow bookshelves instead of wide ones. Use wall-mounted shelves (if permitted, or consider freestanding shelving units that reach high). Over-the-door organizers are great for small supplies.
* **Multifunctional Furniture:** A storage ottoman can serve as seating and a place to stash books or games. A desk with built-in drawers or shelves is a win.
* **Rolling Carts:** An art cart or a general supply cart on wheels can be moved around and tucked away when not in use. Look for carts with multiple tiers.
* **Clear Storage:** Using clear bins allows you to see what’s inside, which is helpful in a tight space to avoid overbuying or forgetting what you have.
* **Rental-Friendly Solutions (No Drilling):**
* **Freestanding Shelving:** Opt for sturdy, non-drilling shelving units. Cube storage units are excellent for this, as they are stable and versatile.
* **Command Strips/Hooks:** For hanging lightweight items like clipboards, calendars, or small organizers, strong adhesive strips can be a lifesaver. Make sure to follow the weight limits and removal instructions carefully.
* **Tension Rods:** Use tension rods in closets or under sinks to hang storage solutions or create makeshift dividers.
* **Stackable Containers:** Choose stackable bins and drawers that don’t require wall mounting.
* **Furniture Placement:** Arrange furniture strategically to create natural divisions and storage zones without needing to attach anything to walls. For example, a bookshelf can act as a divider between learning and living areas.
### Styling Notes: Colour, Texture, What to Put Where So It Still Looks Good Once It Is In Use
Organization doesn’t have to mean sterile and boring! We can create a beautiful and inviting learning space.
* **Colour Palette:** Choose a calming and inspiring colour scheme. Soft blues, greens, or neutrals are excellent for focus. You can introduce pops of brighter colours with artwork, book spines, or small decorative items.
* *Tip:* Use cohesive colours for your bins and baskets to create a unified look. For example, all wood-toned baskets or all white fabric bins.
* **Texture:** Mix textures to add visual interest. Woven baskets, smooth plastic bins, the grain of wooden shelves, and the softness of fabric bins can all contribute to a warm and inviting feel.
* **What to Put Where (Aesthetic & Functional):**
* **Front and Centre (Eye Level):** This is prime real estate! Place items your children use daily or are currently studying here. Think current reading books, frequently used notebooks, a visual schedule, or inspiring artwork.
* **Easily Accessible (Child Level):** Art supplies, math manipulatives, general writing tools, and books for independent reading should be at a height your children can easily reach and put away themselves.
* **Higher Shelves/Out of Reach:** Textbooks for subjects not currently being studied, older curriculum, or less frequently used items can go here.
* **Contain the “Pretty”:** Grouping similar items in attractive bins and baskets makes a huge difference. For example, art supplies in a colourful woven basket, or reading books in a stylish wooden bin.
* **Leave Some Breathing Room:** Don’t cram shelves to bursting. A little negative space makes a space feel more organized and less overwhelming.
### How to Keep It Tidy After Week One
The initial setup is fantastic, but the real magic is in the maintenance.
* **The “One In, One Out” Rule:** When new supplies or books come in, try to have a corresponding item leave (donated, recycled, or discarded).
* **Daily 5-Minute Tidy:** Before transitioning to the next activity or at the end of the homeschool day, spend just 5 minutes resetting the space. Everyone helps put things back in their designated homes.
* **Weekly Reset:** Dedicate 15-30 minutes each week (perhaps Friday afternoon) for a more thorough tidy. This is when you might:
* Put away completed work.
* Sort through any new papers.
* Wipe down surfaces.
* Restock any bins that are running low.
* **Involve the Kids:** This is key! Teach them the system and empower them to be responsible for their own learning space. Make it a family effort.
* **Regular Purges:** Schedule a bigger declutter and organization session every 3-6 months to go through and get rid of things you no longer need.
### The Mistakes That Make This Fail
We’ve all been there. Here are some common pitfalls to avoid:
* **Not Planning:** Jumping in without measuring or assessing needs leads to buying the wrong things and wasted money.
* **Over-Organizing:** Trying to create a perfectly Pinterest-worthy space that is too complicated for daily use will backfire. Keep it functional and easy.
* **Lack of Accessibility:** If it’s too hard for your children to get supplies out or put them away, they simply won’t. Ensure things are within reach.
* **Not Labeling:** Ambiguity breeds chaos. If it’s not labeled, people will put things in the wrong place.
* **Not Involving Children:** If the organization system is solely yours, your children won’t buy into it and will be less likely to maintain it.
* **Too Many Small, Loose Items:** Avoid having dozens of tiny things that have to be put away individually. Group them into larger containers.
* **Forgetting Maintenance:** Organization isn’t a one-time event. It requires ongoing effort and routine.
* **Trying to Do It All at Once:** If your space is a disaster, break it down into smaller, manageable projects. Tackle one shelf or one category at a time.
Creating a brilliantly organized homeschool space is an ongoing journey, not a destination. By planning thoughtfully, implementing practically, and maintaining consistently, you can build a learning environment that supports your family’s educational goals and fosters a love of learning. Happy organizing!
Conclusion
Implementing brilliant homeschool organization ideas can truly transform your learning environment. Imagine smoother transitions, less frantic searching, and more focused teaching – a tangible difference that impacts your family’s days. Don’t feel overwhelmed by a complete overhaul; your smallest possible first step could be as simple as decluttering one designated learning surface.
Perhaps this weekend, you could tackle the kitchen counter, repurposing a pretty basket for art supplies. Or for a tighter budget, consider a simple DIY label maker for existing bins in the playroom. These small victories pave the way for a more peaceful and productive homeschool journey.
We encourage you to explore more of our tips and find inspiration that resonates with your unique needs. Let’s create brilliant homes together!