Easy Crochet Pumpkins: Free Pattern, Sizes!
Free crochet pumpkin patterns in 6 sizes are here to rescue your autumn decorating! Are you tired of those bare corners and empty shelves, feeling like your seasonal decor just isn’t quite coming together? Picture this: a charming collection of plump, handcrafted pumpkins, from tiny desk accents to generously sized floor decor, each one bringing cozy, handmade warmth to your home. And the best part? This project is incredibly budget-friendly, likely costing you just a few dollars for yarn, and can be completed in just a few hours per pumpkin. In this article, I’ll guide you through each step, sharing simple techniques to crochet these adorable gourds, no matter your crochet skill level.
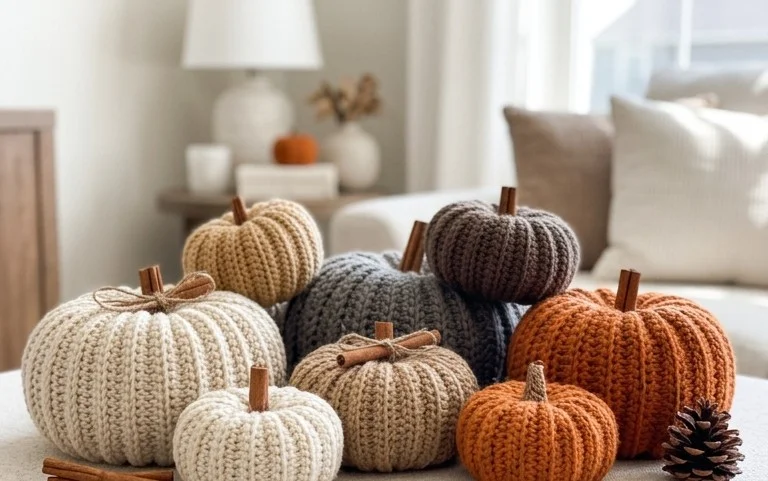
Craft Your Cozy Corner: Free Crochet Pumpkin Pattern in 6 Sizes!
Hello, fellow decor enthusiasts! As the crisp autumn air arrives, there’s something undeniably charming about ushering in the season with handmade touches. This year, I’m absolutely thrilled to share my go-to free crochet pumpkin pattern, one that’s incredibly versatile and comes in six different sizes! Imagine a cascade of charming, plump pumpkins adorning your shelves, mantelpiece, or even creating a whimsical centerpiece for your dining table. This project is not only budget-friendly but also wonderfully adaptable, making it perfect for renters or anyone who loves a temporary, festive touch. Let’s dive into creating your very own pumpkin patch!
Gathering Your Supplies: What You’ll Need and Estimated Costs
The beauty of this crochet pumpkin pattern is its simplicity, requiring minimal supplies. For each pumpkin, you’ll primarily need yarn and some stuffing.
* **Yarn:** I recommend using a worsted-weight acrylic yarn. It’s durable, easy to care for, and comes in a fantastic array of colors. A standard 3.5 oz (100g) skein will make multiple small to medium pumpkins. For a set of six varied sizes, I’d suggest purchasing around 2-3 skeins of your main pumpkin color and one skein of a contrasting color for the stem.
* *Rough Cost:* Expect to spend around $10-$20 for enough yarn to make a generous collection. Specialty yarns or natural fibers will increase this cost.
* **Crochet Hook:** A size H/8 (5mm) crochet hook is perfect for worsted-weight yarn.
* *Rough Cost:* A good quality hook can be purchased for $3-$8.
* **Stuffing:** Polyester fiberfill is your best friend here. It’s affordable and provides a lovely, squishy fullness.
* *Rough Cost:* A 16 oz bag of fiberfill is usually around $7-$12, and it will last you for countless crochet projects.
* **Tapestry Needle:** For weaving in your ends.
* *Rough Cost:* A pack of a few tapestry needles is typically $2-$5.
* **Scissors:** For cutting yarn.
* *Rough Cost:* Any sharp pair will do!
So, for a lovely assortment of six pumpkins, your estimated cost would be in the ballpark of $20-$40, depending on the yarn brands you choose. It’s a fantastic value for a truly personalized decor piece!
Measure Twice, Crochet Once: Planning Your Pumpkin Patch
Before we even pick up our hooks, a little planning goes a long way. The beauty of this pattern is its scalability, but understanding your space will help you choose the right sizes for maximum impact.
First, consider where you envision your pumpkins residing.
* **Shelves:** If you’re decorating bookshelves or floating shelves, you’ll want to measure the available depth and height. For example, a typical shelf might be around 10-12 inches deep. You wouldn’t want a pumpkin to be wider than half the depth to avoid a cramped look.
* **Mantelpiece:** Mantelpieces often have more vertical space and can accommodate larger statement pumpkins, or a varied arrangement of smaller ones. Measure the length of your mantel to gauge how many pumpkins you can comfortably fit without looking cluttered.
* **Table Centerpiece:** For a dining table, consider the height of your pumpkins so they don’t obstruct conversation. A cluster of varying sizes, perhaps with a few taller stems, can create a beautiful focal point.
The beauty of this free pattern is that it’s designed to be infinitely customizable in size. The six sizes I’ve outlined are just a starting point, and you can easily adjust stitch counts to make them bigger or smaller. Think about the visual weight you want to create. A few larger pumpkins can make a statement, while many smaller ones offer a more whimsical, playful feel.
Let’s Get Crocheting! The Step-by-Step Process
This pattern is worked in the round from the bottom up. It’s a beginner-friendly project, perfect for practicing your single crochet stitches.
Here’s the general process for each pumpkin, which you’ll repeat for all six sizes (with varying stitch counts, explained in the pattern itself which I’ll be providing below):
1. **Start with a Magic Ring:** This creates a tight, neat base for your pumpkin.
2. **Increase Rounds:** You’ll work rounds of single crochet (sc) stitches, increasing at regular intervals. This is what forms the spherical shape of your pumpkin. The number of stitches you increase in each round will determine the overall width of your pumpkin.
3. **Work Even Rounds:** Once you’ve reached the desired circumference for your pumpkin, you’ll work several rounds of sc without any increases. This creates the straight sides of the pumpkin.
4. **Decrease Rounds:** Similar to the increase rounds, you’ll start decreasing stitches at regular intervals. This is what cinches the top of the pumpkin closed.
5. **Stuffing Time:** Before you decrease too much, it’s time to stuff your pumpkin! Pack it firmly but not so tightly that the stitches distort. You want it to be nicely plump.
6. **Closing the Top:** Continue with your decrease rounds until you have a small opening left. Fasten off, leaving a long tail.
7. **Weaving the Stem:** Thread your tapestry needle with the yarn tail. Weave the needle through the top stitches of the opening, pulling it tight to gather the fabric. Then, thread it through the center of the stuffed pumpkin and out the bottom. Pull gently to create the characteristic pumpkin indentation. Repeat this a few times, pulling the yarn taut each time to reinforce the shape and create those lovely pumpkin “ribs.”
8. **Creating the Stem:** For the stem, you’ll typically crochet a small, short tube. Some patterns might have you chain a few stitches and work single crochet back and forth, or work in the round for a small cylinder. Attach this stem securely to the top of your pumpkin.
*Please note: The exact stitch counts for each of the six sizes will be detailed in the full pattern, which you can find easily online. This guide focuses on the overall process and considerations.*
Styling Your Crochet Pumpkins: Adding Autumnal Charm
Now for the fun part: styling! The beauty of these crochet pumpkins is their inherent warmth and texture.
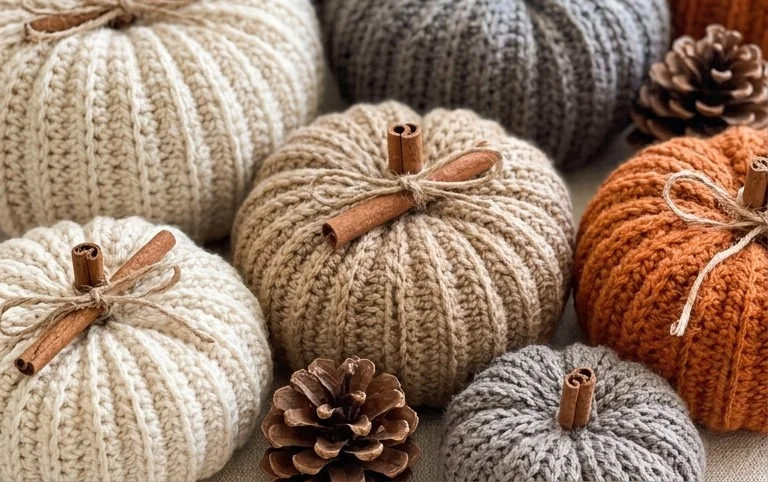
* **Color Palette:** While traditional oranges are always a hit, don’t shy away from other autumnal hues. Think deep burgundies, mustard yellows, olive greens, creamy whites, and even soft grays. Mixing and matching these colors creates a sophisticated and cohesive look. For a rental, consider muted tones that blend with your existing decor.
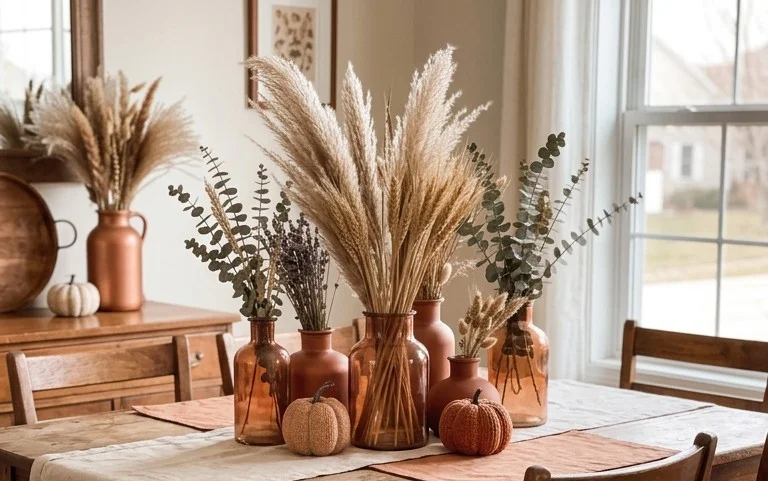
* **Texture Play:** Combine your crochet pumpkins with other textures. Place them on a chunky knit throw, nestled amongst faux fall foliage, or alongside smooth ceramic decorative items. The contrast will make your pumpkins pop.
* **Placement is Key:**
* *Mantelpiece:* Arrange a few larger pumpkins in the center, flanked by smaller ones. Tuck in some faux leaves or sprigs of eucalyptus.
* *Shelves:* Group 3-5 pumpkins of varying sizes on a single shelf for impact. Alternate colors and heights. You can even place one on top of a stack of books.
* *Entryway Table:* A cluster of pumpkins, perhaps with a small sign that says “Grateful” or “Autumn,” sets a welcoming tone.
* *Centerpiece:* For a table, a tiered arrangement can be stunning. Use a charger plate as a base and build your pumpkin display on top, perhaps incorporating some mini gourds or acorns.
* **Rental-Friendly Styling:** For rentals, avoid anything that requires drilling or permanent adhesive. Use command hooks for hanging garlands of mini pumpkins, or simply group them on surfaces. They are lightweight and easily moved.
Keeping Tidy: Maintaining Your Pumpkin Patch Week After Week
One of the best things about crochet pumpkins is how low-maintenance they are.
* **Dusting:** A gentle dusting with a soft brush or a microfiber cloth is usually all they need.
* **Spot Cleaning:** If a pumpkin gets a small mark, you can try gently spot cleaning with a damp cloth and a tiny bit of mild soap. Blot, don’t rub, and let it air dry completely.
* **Reshaping:** Over time, the stuffing might settle. Simply give your pumpkins a gentle squeeze and a reshape to bring back their plumpness.
Avoiding the Pitfalls: Mistakes That Make This Fail
Even with a simple pattern, there are a few common mistakes that can prevent your pumpkins from looking their best.
* **Understuffing:** This is the most common culprit for sad-looking pumpkins. If you don’t stuff them enough, they’ll be floppy and won’t hold their shape. Be generous with your stuffing!
* **Overstuffing:** Conversely, stuffing them too tightly can distort the stitches, making them look stretched and potentially revealing the stuffing color underneath. Aim for plump but not strained.
* **Poor Stem Attachment:** A wobbly or unevenly attached stem can really detract from the finished look. Take your time when sewing the stem on securely. Ensure it’s centered and stands upright.
* **Inconsistent Stitch Tension:** If your tension varies greatly throughout the project, your pumpkin might have uneven bumps or slumps. Try to maintain a consistent tension as you crochet.
* **Skipping the Shaping Weaves:** Those few extra passes of weaving yarn through the top of the pumpkin to create the “ribs” are crucial for that classic pumpkin look. Don’t skip this step! It transforms a simple ball into a recognizable gourd.
With these tips and the free pattern, you’ll be well on your way to creating a wonderfully cozy and festive autumn display. Happy crocheting!
Conclusion
Adding these charming crochet pumpkins to your home truly makes a difference day to day, bringing a touch of handmade warmth and seasonal joy. Even a single small pumpkin can brighten a desk or a shelf! For a quick, budget-friendly start, try the smallest size to adorn your entryway table today. If you’re looking for a different vibe, consider a cluster of the medium sizes for a cozy reading nook, or a large statement pumpkin for your mantelpiece. We hope these crochet pumpkins inspire you to create something beautiful.
Explore more
There are so many more delightful home decor and organization ideas waiting for you!