Easy DIY Desk Lazy Susan: Budget Organization Ideas
Build a DIY Desk Supplies Lazy Susan and finally conquer the chaos on your workspace! Are you tired of that frantic scramble for pens, paperclips, or that elusive stapler, only to find it buried under a mountain of other essentials? Does your desk feel like a black hole where tidiness goes to die? Then it’s time to create a simple, stylish solution that will bring a sense of calm and order. Imagine a smooth-spinning carousel, keeping all your must-haves within easy reach, beautifully organized and effortlessly accessible. This project is surprisingly affordable, costing around $15-$25 and taking just a couple of hours to complete. In this article, you’ll learn the straightforward steps to build your own basic, yet brilliant, lazy susan, transforming your cluttered surface into a functional and inspiring command center.
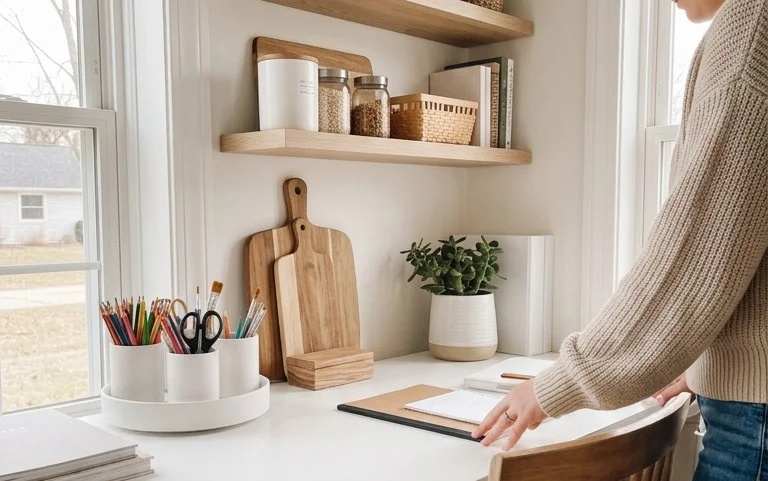
Build Your Own Desk Supplies Lazy Susan: The Basic Build
Let’s face it, a cluttered desk is a creativity killer. Pens roll away, staplers mysteriously vanish, and that important sticky note gets buried under a mountain of paper. I’ve been there, and trust me, it’s a frustrating cycle. But what if I told you there’s a simple, affordable DIY project that can bring order and a touch of personalized style to your workspace? Enter the DIY Desk Supplies Lazy Susan. This is the basic build, designed for ease and effectiveness, and I’m going to walk you through every step.
This project is perfect for anyone who wants to declutter their desk without breaking the bank. It’s a fantastic way to keep your most-used items within easy reach while maintaining a visually appealing workspace. Plus, it’s surprisingly customizable, so you can tailor it to your specific needs and aesthetic. Ready to transform your desk? Let’s get started!
What You’ll Need and Rough Costs
The beauty of this project lies in its simplicity and affordability. You likely already have some of these items, or they are easily and inexpensively sourced. Here’s what you’ll need:
- Two round wooden pieces. For a standard desk size, I recommend one piece that is 10 inches (25 cm) in diameter and another that is 8 inches (20 cm) in diameter. Plywood or MDF are excellent choices. You can often get these cut to size at your local hardware store for a small fee, or even free if you purchase other materials.
- One lazy susan bearing. These are readily available online or at hardware stores. Look for a bearing with a weight capacity suitable for your desk supplies – a 4-inch (10 cm) diameter bearing should be sufficient. Expect to pay around $5 to $10.
- Wood glue. A standard bottle of wood glue will last you for many projects. A 4oz bottle typically costs between $3 to $6.
- Wood screws. You’ll need about 4-6 small wood screws, roughly 1/2 inch (1.3 cm) long. If you’re buying a small pack, it will likely be under $3.
- Sandpaper. A medium-grit (around 120) and a fine-grit (around 220) will be perfect for smoothing. A small pack is usually around $2 to $4.
- Optional: Paint, stain, or sealant. This is where you can really personalize your lazy susan. Acrylic paints are affordable ($2-$5 per small pot), wood stains range from $7-$15, and a clear sealant or polyurethane will be around $8-$12.
- Optional: Felt or cork pads. To protect your desk surface and prevent slipping. A small roll of felt or a sheet of cork will cost around $3-$5.
Overall, for the core materials, you’re looking at a budget of roughly $15 to $30. Add in your chosen finishes, and it’s still incredibly budget-friendly.
Measuring and Planning Before You Start
Before you even pick up a tool, a little planning goes a long way. Think about what you want to store on your lazy susan. Do you have a lot of pens and pencils? A towering stack of sticky notes? A bulky stapler? This will influence the size of your base and the layout of your items.
For this basic build, we’re using two rounds: a larger base (10-inch) and a smaller top (8-inch). The 2-inch difference in diameter gives the bearing space to spin freely without hitting the edges. Your 10-inch base needs to be large enough to accommodate your largest items comfortably when they’re all gathered. Measure the footprint of your bulkiest desk accessory – your stapler, your tape dispenser, or even a small monitor stand – and ensure it fits within the 8-inch top circle when placed centrally. It’s better to err on the side of slightly too big than too small.
Also, consider the height of your desk. While this build is low-profile, ensure the finished lazy susan won’t obstruct your view or make it awkward to reach other items on your desk.
Your Step-by-Step Guide to Building Your Lazy Susan
Now for the fun part – building! This process is straightforward and rewarding.
- Prepare Your Wooden Rounds: If your wood pieces aren’t already cut to size, measure and cut them. Once cut, take your medium-grit sandpaper and lightly sand the edges and surfaces of both rounds to remove any splinters or rough patches. Follow up with the fine-grit sandpaper for a smooth finish. Wipe away any dust with a clean cloth.
- Mark for the Bearing: Take your larger, 10-inch base piece. Find the exact center by drawing diagonal lines from opposite corners. Where these lines intersect is your center point. Now, take your lazy susan bearing and place its center over this mark. Trace around the inner edge of the bearing’s mounting holes. This will show you where to pre-drill for the screws that attach the bearing to the base.
- Attach the Bearing to the Base: Using a drill bit slightly smaller than your wood screws, pre-drill pilot holes through the marked circles on the base piece. This prevents the wood from splitting when you insert the screws. Position the bearing over the pre-drilled holes, ensuring it’s centered. Secure the bearing to the base using your wood screws. Make sure they are snug but don’t overtighten and strip the holes.
- Mark for the Top Piece: Now, take your smaller, 8-inch top piece. Again, find the center point. Place the bearing (which is now attached to the base) onto a flat surface, with the bearing facing up. Carefully place the 8-inch top piece onto the bearing, centering it visually. Trace around the inner edge of the bearing’s mounting holes onto the 8-inch top piece.
- Attach the Top Piece to the Bearing: Just like with the base, pre-drill pilot holes on the 8-inch top piece where you traced the bearing’s mounting holes. Carefully flip the bearing (still attached to the base) so the bearing is facing upwards. Position the 8-inch top piece onto the bearing, aligning the pre-drilled holes. Secure the top piece to the bearing using wood screws. Again, be careful not to overtighten.
- Finishing Touches (Optional but Recommended): If you plan to paint, stain, or seal your lazy susan, now is the time! Follow the instructions on your chosen product. For painting, a couple of thin coats will give you a smoother finish than one thick coat. Let it dry completely between coats. Once your finish is dry, you can add felt or cork pads to the underside of the 10-inch base to protect your desk.
- Let it Cure: Before you load it up with supplies, allow the wood glue and any finishes to cure fully. This usually takes at least 24 hours.
Adapting for Small Spaces or Rentals
This basic build is already quite space-efficient, but if you’re working with a truly tiny desk or live in a rental where drilling is a no-go, here are some adaptations:
- Smaller Diameter: Simply reduce the diameter of both wooden rounds. A 7-inch (18 cm) base and a 5-inch (13 cm) top would work well for very compact spaces.
- No-Drill Rental Option: For rentals, skip attaching the bearing directly to the wood. Instead, you can use strong, double-sided mounting tape (designed for heavy-duty use and removal without damage) to attach the bearing to the underside of the 8-inch top piece. Then, use more of that strong tape to adhere the bearing (with the top piece attached) to the 10-inch base. Alternatively, some lazy susan bearings have a lip that could allow for a strong adhesive to work without screws. Always test adhesives in an inconspicuous area first.
- Use a Pre-Made Base: If you’re really pressed for time or skill, you could purchase a pre-made wooden lazy susan base (often sold for serving platters) and then build your smaller top piece and attach it to the top of that.
Styling Notes: Color, Texture, and Placement
A functional item doesn’t have to be boring! Styling your lazy susan can elevate your entire workspace.
- Color:
- Natural wood tones: A simple stain or clear sealant lets the natural beauty of the wood shine. This creates a warm, inviting feel.
- Bold pops of color: Paint the top in a vibrant hue that complements your office decor – think a cheerful yellow, a calming teal, or a sophisticated navy.
- Monochromatic chic: Paint both the top and base in coordinating shades of grey, white, or black for a modern, minimalist look.
- Texture:
- Smooth finish: Sanding and a good sealant provide a sleek, modern feel.
- Distressed look: If you opt for paint, a light sanding after the paint is dry can create a subtly distressed, vintage vibe.
- Adding elements: You could even adhere a thin layer of cork or felt to the top surface for added texture and to prevent items from sliding.
- Placement and Organization: This is key to maintaining the “looks good” factor even when in use!
- High-use items at the front: Place your most frequently used pens, a small notebook, or your phone within easy reach.
- Grouping similar items: Keep all your pens and pencils together, highlighters in one spot, and smaller office supplies like paper clips and erasers in a small container or dish on the lazy susan.
- Utilize height: If you have taller items like scissors or a ruler, place them in a small cup or pencil holder that sits on the lazy susan. This adds visual interest and keeps them upright.
- Don’t overstuff: The goal is organization, not cramming. Leave some breathing room so items are easy to see and grab.
Keeping It Tidy After Week One
The initial wave of tidiness is often non-intoxicating, but how do you keep it that way? It’s all about forming small, sustainable habits.
- The “One-Minute Rule”: If putting an item back takes less than a minute, do it immediately. Finished with a pen? Put it back on the lazy susan. Used a pair of scissors? Return them.
- Weekly Tidy-Up: Dedicate five minutes at the end of each week (Friday afternoon is perfect!) to a quick declutter. Straighten up any straggling items, remove any trash (like stray paper clips or broken pen parts), and give it a quick wipe down if needed.
- Regular Purge: Periodically (monthly or quarterly), take a moment to assess what’s on your lazy susan. Are there pens that no longer write? Sticky notes you’ll never use? Dispose of what you don’t need. This prevents the build-up of “clutter creep.”
- Designated Homes: Reinforce the idea that the lazy susan is the *home* for these specific desk supplies. When you need something, you know where to find it. When you’re done, it goes back to its designated spot.
Mistakes That Make This Fail
Even the simplest projects can have pitfalls. Here are a few common mistakes to avoid:
- Using the Wrong Size: If your top piece is too large, it will hit the base or your items will be too far apart. If it’s too small, you won’t have enough surface area. Sticking to the recommended size difference is important.
- Failing to Pre-Drill: This is especially true with MDF or thinner plywood. Skipping pilot holes is a recipe for split wood and a wobbly lazy susan.
- Overtightening Screws: This can strip the wood and weaken the connection between the bearing and the wood. Snug is good; Herculean strength is not required.
- Overloading it: A lazy susan is for frequently used items. Trying to store your entire office supply cabinet on it will make it unwieldy and defeat the purpose of organization.
- Ignoring the Balance: If you place all your heavy items on one side, the lazy susan will be lopsided and might not spin smoothly. Distribute weight as evenly as possible.
- Not Letting Finishes Cure: Rushing this step can lead to smudges, peeling paint, or a sticky surface that attracts dust. Patience here is key for a beautiful, lasting finish.
Building your own desk supplies lazy susan is a rewarding and practical project. With a little effort and a few basic materials, you can create a functional and stylish centerpiece for your desk that will help you stay organized and focused. Happy building!

Conclusion
Tidying up your workspace with a DIY desk supplies lazy susan might seem like a small project, but the impact on your daily routine is surprisingly significant. Imagine effortlessly spinning to find that pen, staple remover, or sticky notes, all within easy reach. This simple organization solution can transform a cluttered desk into a functional and calming environment, boosting your productivity and reducing everyday frustrations.
Ready to experience the difference? Your smallest first step today could be as simple as gathering a few cardboard circles and some glue. For a different vibe, consider a larger one for your craft room, or a smaller, painted version for your bedside table. We hope this project inspires you to embrace more DIY organization. Explore more ideas on our site and keep creating a space you love!
