Easy Thrift Glass Vase Makeover: Budget Decor Ideas
Thrift store glass vase makeovers are the secret weapon against that familiar feeling of looking around your home and seeing… well, a little bit of *blah*. Does that plain, dusty glass vase on your shelf just blend into the background, or worse, feel like a forgotten impulse buy? I know the feeling! Today, I’m so excited to share how we’re transforming a simple thrift store find into a stunning, custom piece that adds instant personality and a pop of sophisticated style. Imagine a vase that doesn’t just hold flowers, but *enhances* them with unique texture and a rich, captivating color. For less than $10 and in under an hour, you can create something truly special. I’ll walk you through exactly how to pick the perfect vase, the easy-peasy technique I used, and a few styling tips to make your new centerpiece shine.
Thrift Store Glass Vase Makeover: A Budget-Friendly Transformation for Your Home
Hello fellow decor enthusiasts and organization aficionados! Kim Pepper here, and today we’re diving into a project that’s near and dear to my heart – transforming a humble thrift store find into a statement piece for your home. We’re talking about glass vases. You know, those often overlooked treasures lurking on dusty shelves, waiting for a second chance. With a little imagination and a few simple supplies, we can give them a fabulous makeover that’s both stylish and incredibly affordable. This project is perfect for adding a touch of personality to any room, and I’ll be guiding you through every step.
Why Thrift Store Vases?
Honestly, why pay full price for something that can be found for a fraction of the cost at your local thrift store or charity shop? I recently snagged a beautiful, albeit slightly dated, clear glass vase for just $3. It had a classic shape but lacked any real pizzazz. It was the perfect candidate for a DIY transformation, and I’m so excited to share the process with you. Not only are you saving money, but you’re also embracing sustainable decorating, giving new life to an item that might otherwise end up in landfill. Plus, the sheer variety you can find in thrift stores is astounding – from chunky hobnail to delicate etched patterns, there’s a vase out there for everyone.
What You’ll Need and Roughly What It Costs
The beauty of this project lies in its simplicity and affordability. Here’s a breakdown of what you’ll likely need:
* **Thrift Store Glass Vase:** As mentioned, I found mine for $3. Prices can range from $1 to $10 depending on the size and uniqueness.
* **Spray Paint:** For this project, I opted for a matte black spray paint. A can usually costs around $5-$8. You can find spray paint in virtually any colour imaginable, so choose something that complements your existing decor. Consider metallic finishes, pastels, or even bold jewel tones!
* **Painter’s Tape:** Essential for creating clean lines and masking off areas you don’t want painted. A roll of good quality painter’s tape typically costs $4-$7.
* **Drop Cloth or Newspaper:** To protect your workspace from paint overspray. You can use old newspapers or a cheap plastic drop cloth, costing around $2-$5.
* **Gloves:** To keep your hands clean. A pair of disposable gloves is usually under $2.
* **Mask:** For protecting your lungs from spray paint fumes. A decent disposable mask is around $3-$5.
* **Optional: Sandpaper (fine-grit):** If your vase has any stubborn stickers or slight imperfections you want to smooth out before painting. A small pack is about $3-$5.
* **Optional: Clear Sealant Spray:** To add durability and a slight sheen, especially if you plan to use it for real flowers. This is another $5-$8.
So, for a basic makeover, you’re looking at a total investment of roughly $15-$30, depending on the vase and the specific paints you choose. That’s a fraction of the cost of a new, stylish vase!
Measuring and Planning Before You Start
Before you even think about picking up a can of spray paint, take a moment to plan. This is a crucial step that can prevent costly mistakes and ensure you achieve the look you desire.
* **Assess Your Vase:** Look at the shape, size, and any existing texture or details. Is it a tall, slender vase, or a short, squat one? Does it have a wide opening or a narrow neck? These characteristics will influence how you paint and style it. My vase was about 10 inches tall and 6 inches in diameter at its widest point.
* **Envision Your Style:** What aesthetic are you going for? Modern minimalist? Boho chic? Glamorous? This will dictate your paint colour choice and any potential embellishments. For my modern farmhouse vibe, matte black felt like the perfect fit.
* **Consider Placement:** Where will this vase live in your home? Will it be a standalone accent piece on a bookshelf, part of a tabletop vignette, or holding flowers on a dining table? Think about the surrounding colours and textures.
* **Measure Your Space:** If you’re concerned about size, measure the intended spot for your vase. This will help you decide if the thrift store vase you’re eyeing is the right scale.
* **Plan Your Design:** Are you going for a solid colour, or do you want to incorporate patterns or colour blocking? If you’re planning intricate designs, sketch them out on paper first. For this project, I was going for a simple, all-over matte black finish.
Taking these few minutes to plan will save you time and frustration down the line.
The Step-by-Step Process: Your Vase Makeover Walkthrough
Here’s how I transformed my thrift store vase:
1. **Clean Your Vase:** Wash the vase thoroughly with soap and water to remove any dust, grime, or price stickers. If there are any stubborn sticker remnants, a little Goo Gone or rubbing non-alcoholic alternative can work wonders. Let the vase dry completely. If you’re using sandpaper, this is the time to gently buff out any minor imperfections or sticker residue.
2. **Prepare Your Workspace:** Lay down your drop cloth or newspaper in a well-ventilated area, ideally outdoors or in a garage. Ensure you have ample space to move around the vase.
3. **Apply Painter’s Tape:** This is where you define your design. For a solid colour, you might only need to tape off the very bottom rim if you don’t want paint there. If you’re creating stripes or a two-tone effect, carefully apply tape along the lines you want to remain unpainted or to create a clean edge. Ensure the tape is pressed down firmly to prevent any paint bleed. For my solid black vase, I only used tape to cover the very bottom edge of the vase.
4. **Prime (Optional but Recommended):** While not strictly necessary for glass, a light coat of spray primer can help the paint adhere better and achieve a more even finish, especially on very smooth surfaces. Let the primer dry according to the manufacturer’s instructions.
5. **Apply First Coat of Spray Paint:** Put on your gloves and mask. Shake the spray paint can well for at least 1-2 minutes. Hold the can about 10-12 inches away from the vase and apply thin, even coats. Avoid trying to cover the entire vase in one go; multiple thin coats are much better than one thick, drippy one. Rotate the vase as you spray to ensure even coverage.
6. **Allow to Dry:** Let the first coat dry completely. This usually takes about 15-20 minutes, but always check the spray paint can for specific drying times.
7. **Apply Subsequent Coats:** Apply additional thin coats, allowing each to dry in between, until you achieve your desired opacity and coverage. I found that three light coats of matte black were perfect for my vase.
8. **Remove Painter’s Tape:** This is the satisfying part! Once the final coat of paint is dry to the touch, carefully and slowly peel away the painter’s tape. If you find any areas where the paint has bled slightly, you can try to gently scrape it away with a craft knife or touch it up with a small brush.
9. **Apply Clear Sealant (Optional):** If you’re using the vase for real flowers, or if you want to add extra protection against chips and scratches, apply a light coat of clear sealant spray. Again, use thin, even coats and allow it to dry completely according to the product instructions.
10. **Cure Time:** Most spray paints and sealants need a few days to fully cure and harden. Avoid handling the vase too much during this time.
Adapting for Small Spaces or Rentals
Worried about damaging your walls or needing to drill holes? This vase makeover is perfect for renters! Since we’re working with spray paint and no permanent adhesives or drilling, it’s a renter-friendly project.
* **No Drilling Needed:** This project involves no drilling whatsoever. The transformation is purely cosmetic.
* **Temporary Solutions:** For small spaces, consider using the vase as a standalone decorative element on shelves, mantels, or windowsills. You can also place it on a console table or bedside table. The key is to choose a vase size that doesn’t overwhelm the area. A taller, slimmer vase can add vertical interest without taking up much surface area.
* **Minimalist Approach:** In a small space, less is often more. A beautifully painted vase can be a statement piece on its own, without needing a plethora of other decorative items around it.
Styling Notes: Bringing Your Vase to Life
Now that your vase is transformed, it’s time to style it!
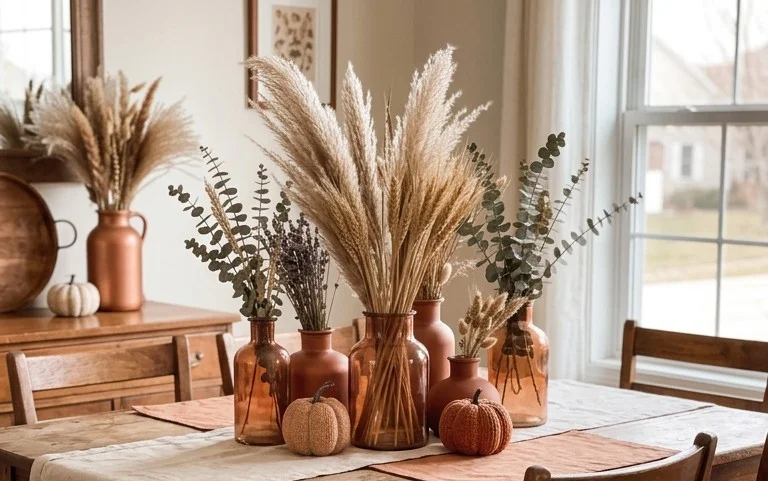
* **Colour Palette:** The matte black vase I created is incredibly versatile. It acts as a neutral canvas that allows whatever you put inside to pop. Consider your existing room colours. If you have a lot of warm tones, a black vase can provide a striking contrast. If your room is already quite monochromatic, you can inject colour with the contents of the vase.
* **Texture Play:** Contrast is key! A smooth, matte vase looks fantastic paired with textured elements.
* **Natural Elements:** Think dried wheat stalks, pampas grass, eucalyptus branches, or even decorative twigs. These add organic texture and movement.
* **Faux Botanicals:** High-quality faux flowers or greenery can also work beautifully and are long-lasting.
* **Real Flowers:** Of course, nothing beats fresh flowers! Opt for blooms that complement your room’s colour scheme. For my black vase, a bouquet of white hydrangeas or vibrant red roses would be stunning.
* **What to Put Where:**
* **Bookshelf Buddy:** Place your vase on a bookshelf, either standing alone or nestled amongst books. Ensure it’s not too close to other items to allow it to be appreciated.
* **Tabletop Statement:** A console table or dining table is a perfect spot for a larger vase. You can place it off-center for a more dynamic look.
* **Window Sill Accent:** A smaller vase can add a touch of charm to a windowsill, catching the light.
* **Entryway Welcome:** Greet guests with a beautifully styled vase in your entryway.
Remember, the goal is to enhance your space, not clutter it. Let your vase be a focal point that draws the eye.
Keeping It Tidy After Week One
The initial thrill of a new DIY project is wonderful, but how do you maintain its charm?
* **Dusting:** A quick weekly dusting with a soft microfiber cloth will keep your vase looking its best. For the matte finish, avoid abrasive cleaners that could damage the paint.
* **Flower Refresh:** If you’re using real flowers, refresh them regularly. This not only keeps your arrangement looking vibrant but also prevents any stagnant water from affecting the vase.
* **Water Management:** If you’re using your vase for real flowers, change the water every 2-3 days to prevent bacteria buildup. Ensure you dry the rim of the vase after refilling.
* **Gentle Cleaning:** If any smudges or fingerprints appear, a slightly damp cloth followed by a dry cloth is usually sufficient. Avoid harsh chemicals.
Mistakes That Make This Project Fail
Even with a simple project like this, there are a few pitfalls to watch out for:
* **Poor Preparation:** Not cleaning the vase properly or not ensuring it’s completely dry can lead to paint adhesion issues.
* **Too Much Paint at Once:** Applying thick coats of spray paint is the number one cause of drips and an uneven, messy finish. Patience and thin coats are your best friends.
* **Not Taping Properly:** Inadequate taping will result in paint bleeding onto areas you didn’t intend to paint, creating jagged lines and a less polished look.
* **Painting in Unsuitable Conditions:** Spray painting in windy or very humid conditions can affect the paint’s drying and adherence. Always aim for a dry, well-ventilated area.
* **Not Allowing Proper Drying/Curing Time:** Rushing the process can lead to the paint being easily scratched or smudged, compromising the final look.
By being mindful of these common mistakes, you’ll be well on your way to creating a beautiful and long-lasting thrift store vase makeover. I hope this inspires you to explore your local thrift stores and unleash your inner decorator! Happy transforming!
Conclusion
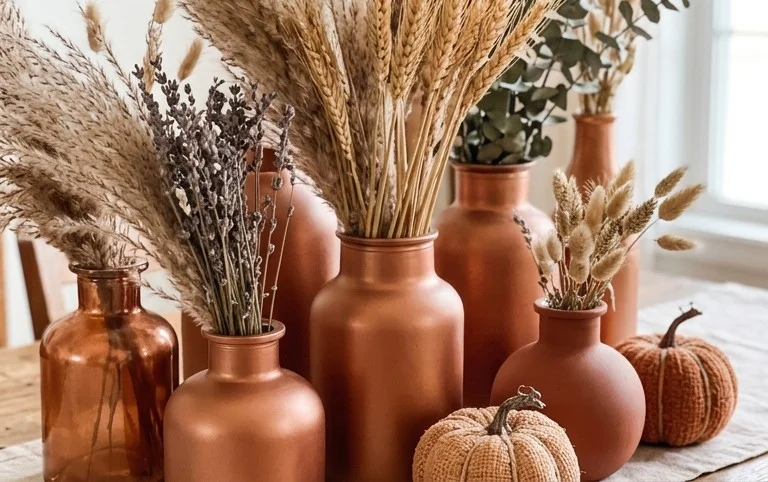
See how a simple thrift store glass vase makeover can truly transform a space? It’s these little touches, the splash of color and personal style, that elevate everyday living. Even the smallest change can bring a surprising amount of joy and order to your day.
Ready to start your own transformation? Your smallest first step today could be simply browsing your local thrift store for that perfect, overlooked vase.
Room & Budget Variations:
For your kitchen, consider a set of painted mason jars for utensil storage. On a tighter budget, a simple coat of spray paint on an old bottle can add instant charm.
I hope this inspires you to see the potential in discarded treasures. There are so many more ideas waiting to be discovered here on the Kim Pepper Blog – come explore!